Friday, August 29, 2014

CHF Challenge #60


Hi bloggers. Time again for a challenge from Cornish Heritage Farms. Our hostess with the moistest is Irit and she has challenge us to make anything but a card. I had to sit the last challenge out due to complication with cataract surgery, but I seem to be coming out the darkness now, literally. I have not been doing a lot of coloring but decided to make a tag for my project and color a small vignette with one of the gorgeous Thomas Kinkade stamps called Streams of Living Water.  I love the peaceful homey feel of all the TK stamps and you can find the best selection at CHF. I colored my image to look like you are staring out a window at this little country chapel on a crisp fall day. Fitting as this Labor Day weekend is the official end of summer.  I embossed my tag with a  M-bossibilities folder EL-028. The window is from Spellbinders D-Lite called Window two.  I sponged, randomly, some Distress inks in Spiced Marmalade, Brushed Corduroy, Shabby Shutters, Scattered Straw, & Dried Marigold. I thought it is a new blend with the fall colors of the image. sorry but I forgot to write down the Copics I used as I am out of practice with my crafting. I added some Prima flower, a flourish, ribbon and twine to complete my tag.
 
This challenge will run until September 5th so you still have time to enter.
If you would like to play along with us of course we would love to have you!
To play create a card using CHF images. You can use either CHF digi or rubber stamps to create a card or project.... anything you like as long as the stamps are Cornish Heritage Farms. (Yes, they can be older stamps)
.You can enter on the CHF blog and let us see your creations. If you enter your project on the blog or SCS or Pinterest just remember to use the code CHF60.


Be sure to visit my Team Mates listed on my sidebar.
Thanks so much for stopping in and come again.
Hugs, Maureen

Monday, August 25, 2014

PPRS Inspiration Monday


Hello again Bloggers. It's time for another Prickley Pear Monday. I have a clean & simple card today using only one stamp set and some flocked animal print designer paper. Animal prints are now the rage again it seems. I've added some animal print fuzzy ribbon and some rhinestones along with a couple corners from Cheery Lynn. The stamp set I used today is CLR027C Scalloped Oval Floral 4
Next Monday is the start of our new release Blog Hop. Sept. 1st, 2nd, & 3rd. Be sure to come & visit and see all the new stamps we have for fall & winter.
.
Thanks for stopping in today and please come back again next week for our hop!
Hugs, Maureen


Friday, August 22, 2014

PPRS Faux "Prima" Rose Tutorial


Hi Bloggers. It's time for my second tutorial as a Design Team Member for Prickley Pear. I have chosen to do flowers again, because they are a passion of mine. Making paper flowers is one of my favorite things to do and I thought I would share an economical way to make these lovely little faux roses. I love the tiny roses Prima sells but it's so hard to find them, or when I do, they aren't the color I want. So this is a great way to customize your flowers to your paper. This die cost about as much as a package of store bought roses and you can make an unlimited supply for yourself.
 Now lets get started.
 

I am using the PrickleyPear D015 Blobby Flowers Die to cut the petals for each rose. I use only the smallest in the die set.


1.    Cut strips of cardstock 1 ¼ inch wide so as to position the die to cut only the smallest of the three, as pictured here. You will need three cuts for each rose you want to make.


2.    The next step is to cut one calyx for each rose. I use an old Stampin’ Up punch, but you can use any petal punch you have, or a star shape will work as well. 
 
3. The next step is to start shaping your petals. I loosen up the paper fibers by bending them upward with a stylus. This makes the paper easier to squeeze and roll to form the rose petals. Make sure to do your calyx's also.
 
 
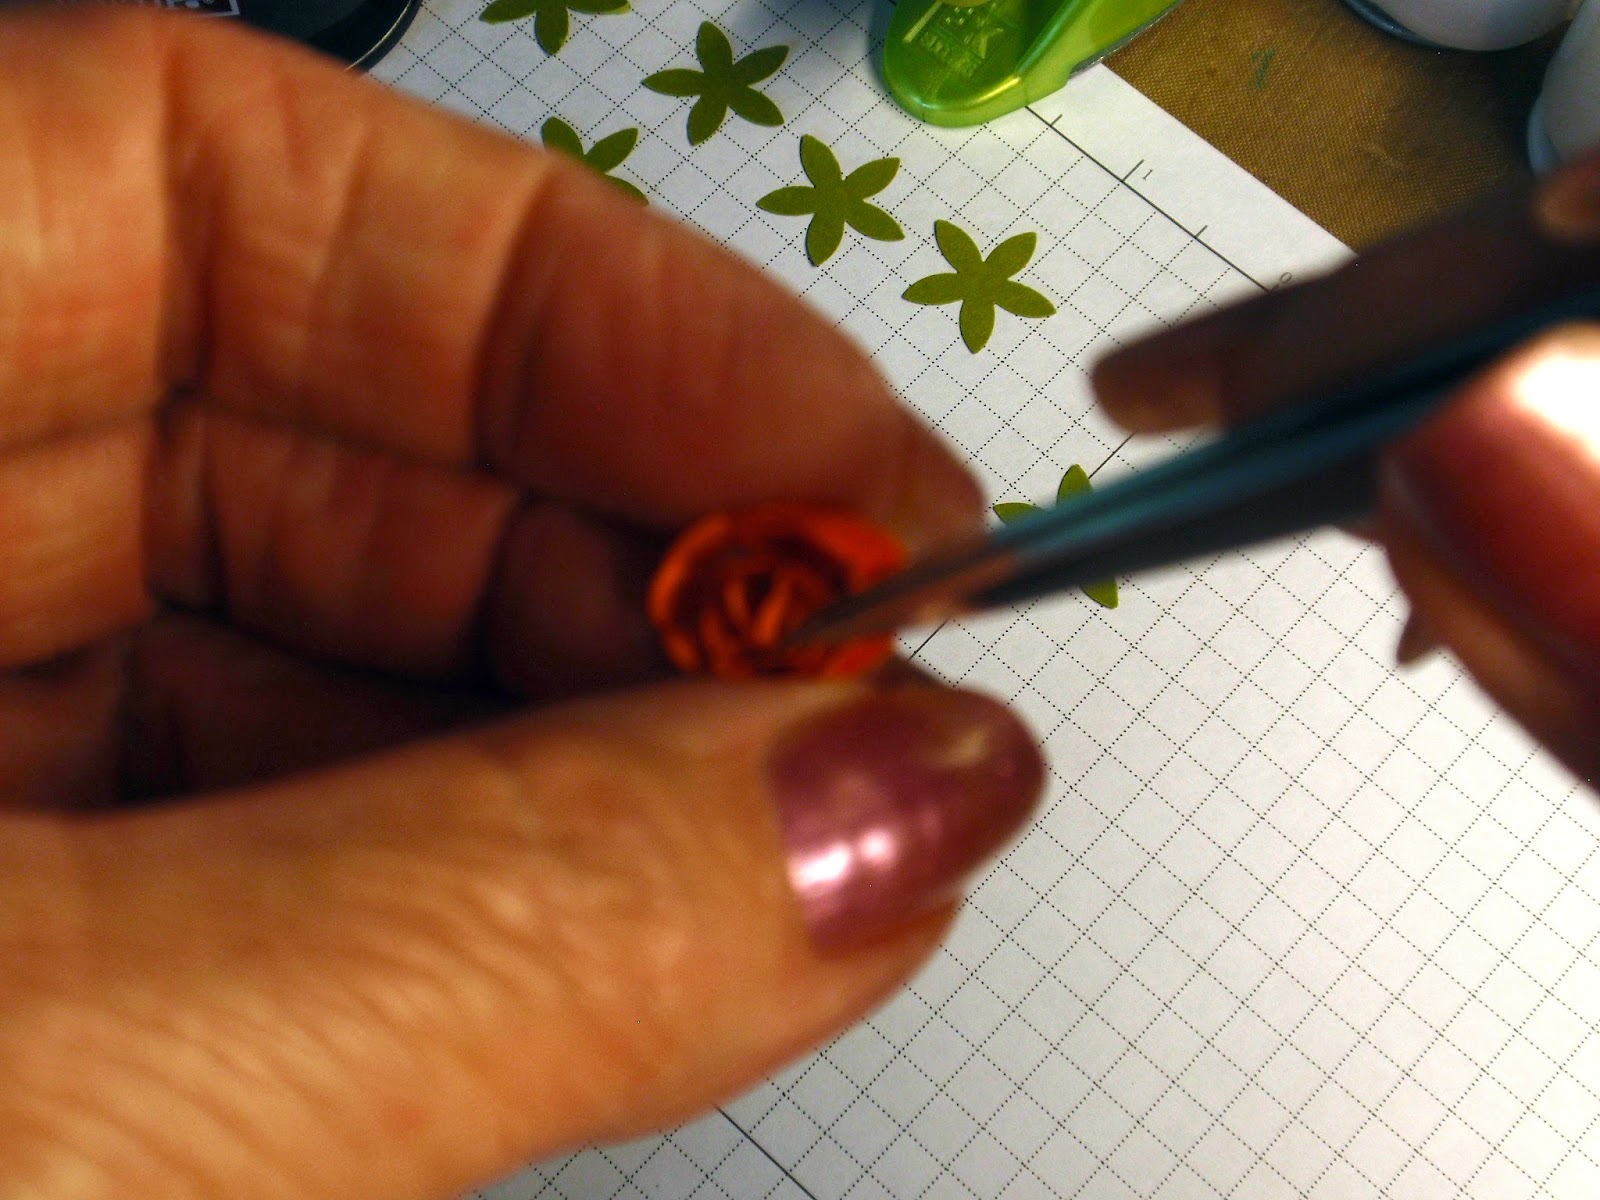
4. You start with one petal and lightly push it over a paintbrush handle. You can use a slender ink pen instead if you don’t have a paintbrush.
 
5. I then squash and roll this center as tightly as possible between my thumb and first finger.
 
6. Use another petal to form the next layer by just gently pushing it toward the center, but not as tight as the first petal.  You will then add a drop of glue in the center of this petal and insert the tight center piece that you formed prior to this step. You may have to use tweezers to place them together as they are quite small. Wait a few minutes for it to dry before going any further.


7. The last petal should be shaped enough from the stylus so you can add a drop of glue to the center of this petal and place your pre-assembled pieces into this last petal. Basically, the same  above.
 

8. Add a drop of glue to your calyx and set your rose in the center of this. Let it dry. After drying you can squish your petals or use a tweezers to roll the petals a little tighter or until you’re happy with the way they look.  
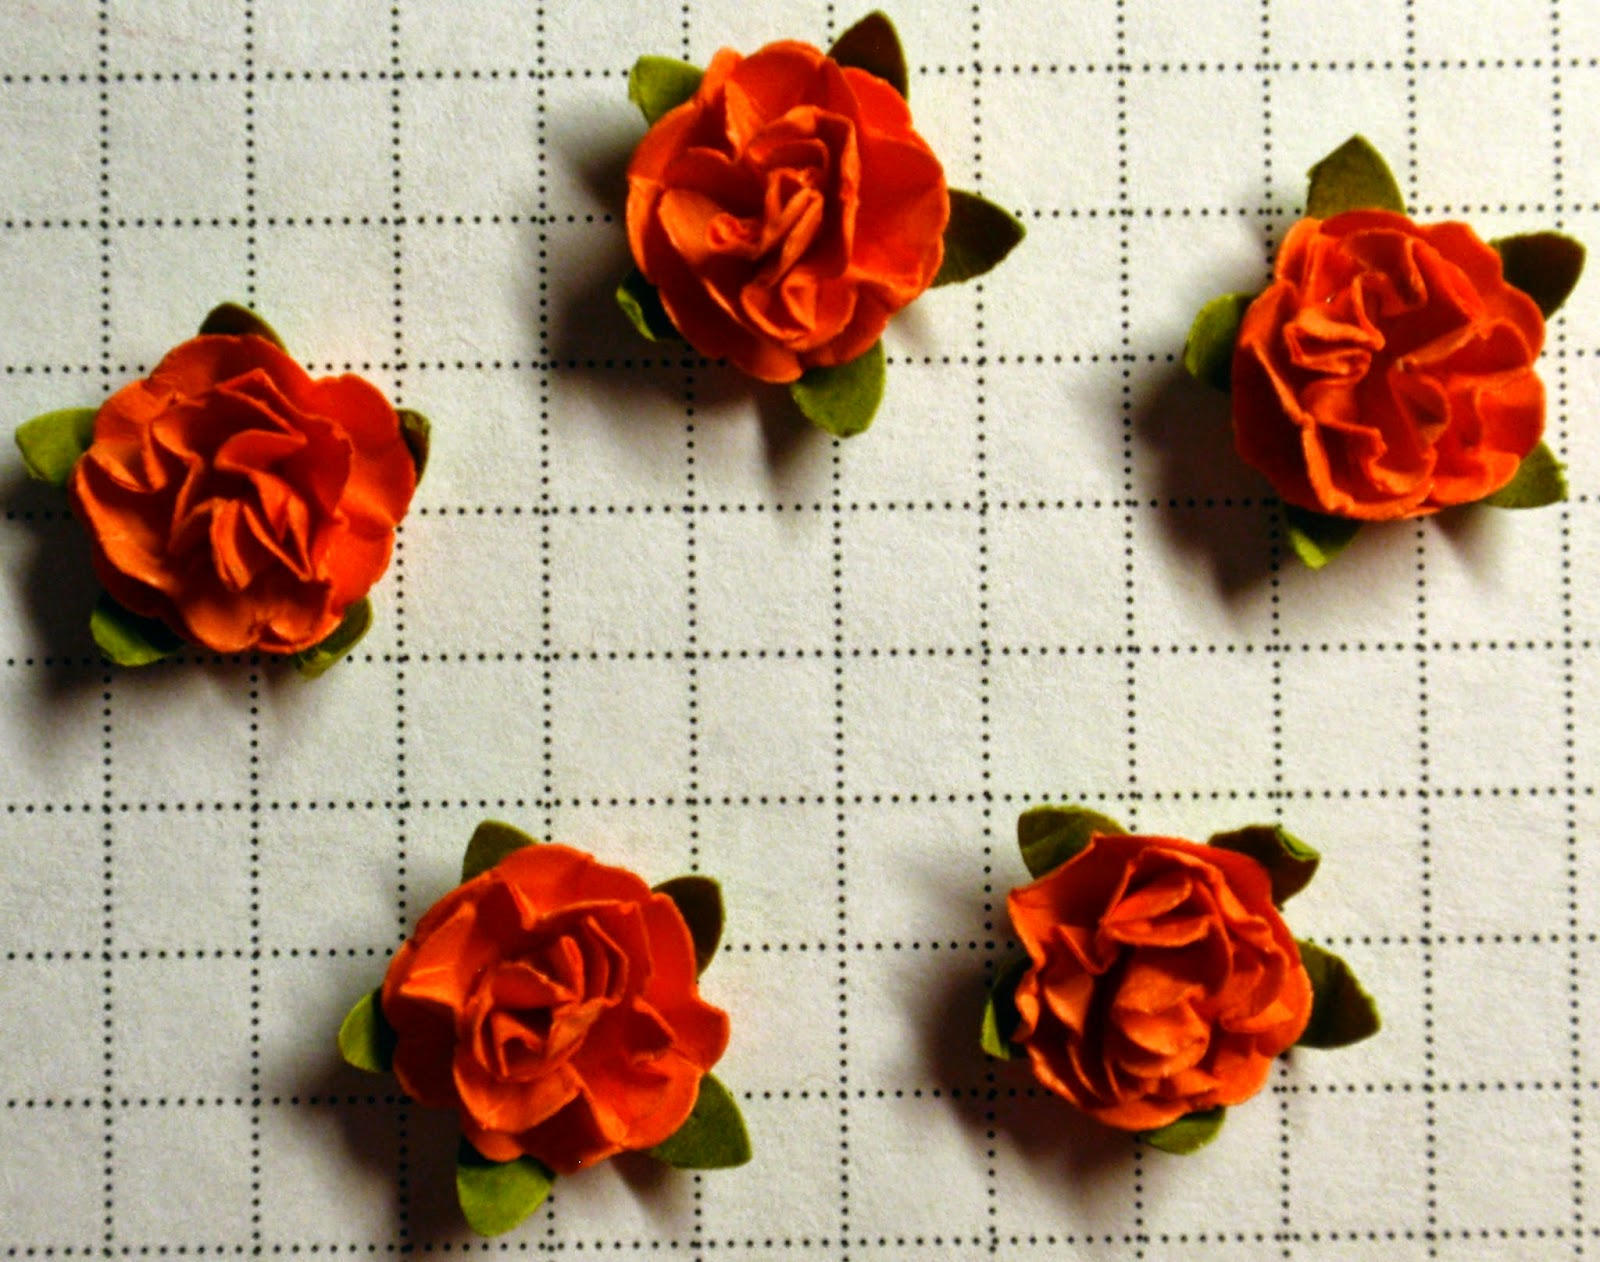
Here are the five roses I created to use on my card. I left mine plain but you can use ink across the tops for a distressed look, or touch the petals with white paint for the ever popular Shabby Chic. Oh and lets not forget GLITTER!!!


Here's my card I created, and as you can see, I used the color in my paper to determine what color to make my roses. I hope you've enjoyed this tutorial & try some roses on your own.
I used Graphic 45 paper from the Steampunk Spells collection, the D015 Blobby Flowers Die, the CLR027C Scalloped Oval 4 Floral stamp set,  the D045 Flourish die, and the
D035 Mini Gears Die set. The leaves are from old MS punches that I have had forever seems like but still come back to when I need a fill in. LOL
Thanks for stopping by today to view my tutorial,
Hugs, Maureen


Monday, August 18, 2014

PPRS Inspiration Monday


Hello bloggers. First off I need to make a correction about our upcoming Blog Hop. It has been rescheduled by the company, I am sure it has something to do with the release getting to the retailers. Anyway the new Blog Hop dates are September 1st., 2nd., & 3rd.  My card today for Prickley Pear is a bright happy card that I have taken some creative liberties with. I have used the Steampunk Gears Die set to make my flowers. I do have the Blobby Flowers die but I wanted more of a Daisy look so I "winged it" as they say. I used the largest and the smallest of the three pieces and did some snipping with scissors, and rolled them around a bit with a stylis, added some punched dots to the larger ones, then added glitter brads to all. I wanted to mimic the flowers on the paper. The paper is a bright happy Colorboc tablet called Hootenanny, how cool is that! My stamped image is EE0194 Wildflower Garden Sm., backed with some ovals made with the Scalloped Oval Nesting Die Set. I used one of the sentiments from the CLR047 Mini Vases Set to complete my card.
I hope you enjoyed my card today & be sure to check out my team mates listed on my side bar.
Hugs, Maureen
 

My Besties Challenge #17


Hello Bloggers. Time again for a wonderful challenge from My Besties. This time our challenge is Use one of your favorite color combinations! This challenge will run from today the 18th until Friday the 29th. You have almost two weeks to enter and remember, use a My Bestie image. We would love to have you join us and there are 5 awesome digi's given away for the 1st prize winner. Our first prize is a random draw so anyone has just as much chance of winning as the next person, so come on in, the challenge is fine! We also have a top 3 prize in which three people will receive 3 digi's. You can enter your project here. We would LOVE to see your work.
My card today is one of my favorite combos, Aqua and Purple. The Bestie I used is IMG895. I think her sweet little butterfly friends are just darling. Oh who am I kidding......I think all Sherry's images are darling!
I colored my image with Copic markers and I will list the colors below. I added some swirly durley things by snipping up a couple die cuts from a Marianne die LR0116. It one I have had for ages, but never seem to tire of it. I used part of a fairly new in'spire die set from Spellbinders called Umbrella Trio to make my fancy corners. I think they look super with the swirly things. I added some Star Dust Stickles to the wings to make them pop. Here's a close up so you can see some of the details.
Copics used:
Skin- E13, 11, 0000
Cheeks- R30, several coats
Hair & Eyes- E79, 47, 57, 43
Lips- RV34, CB
Dress, headband, sock, wings- BG15, 11, 000
Dots- BG18
Lavenders- V06, 01, 000
Shoes- C7, 5, 3
Greens- YG63, G20
 
That's it for me today and thanks so much for stopping by and remember to enter our challenge!
Hugs, Maureen


Monday, August 11, 2014

PPRS Inspiration Monday


Hello Bloggers. It's time again for our inspiration from Prickley Pear. Less than a week until our Fall release, yay!!! We are having a Blog Hop on August 15, 16 & 17th. Be sure to come back and join all the fun!!! My post today will be brief as I have just had cataract surgery  and have had a bit of a complication so I'm not seeing very well & it's hard for me to type, sorry :-(
 I have reverted back to one of my favorite stamp & die sets,
 CLR015A Blobby Flowers and matching D015 Blobby Flowers Die. I am a flower fan on cards & needed a floral fix if you will.  Used a sheet of DCWV Mariposa matstack for my background and chose my colors and flower choice using the paper for my inspiration. I  added the corners from the
D035 Mini Gears Die set with a few brads, and the D045 Flourish Die in place of leaves under my flowers. The sentiment is the DD0209 There is Flattery rubber stamp. The little charms and twine were a last minute thought & I love how it just seemed to finish off the card.
I am also adding a close-up of my flowers because I glued micro beads in the centers and I think it turned out awesome!

Thanks for stopping by today & be sure to some in to visit my team mates listed on my side bar for more PPRS inspiration!
Hugs, Maureen


Monday, August 4, 2014

PPRS Inspiration Monday


Hi Bloggers. It's time for some more inspiration from Prickley Pear. We are winding down our spring & summer release & I'm looking forward to our new release coming on August 15th. I'm working on some things right now so I'll be all ready when we can show them off! My card today is pretty simple, but I love the soft colors and I think it would make a great thinking of you, or remind a friend you miss talking to them card. I've used the CLR013C Scalloped Oval & Circle 4 Floral clear stamp set,
the D042 Scalloped Nesting Die set, and the smallest of the D015 Blobby Flowers Die to make my little roses. I used two sheets from K&Company Designer paper pad "Julianne" for my background & three piece descending banner. Some pretty dotted sheer ribbon and a Cheery Lynn corner die to complete my card.
 
 
I hope you enjoyed my card today & keep watching for our new release announcement. Be sure to check out my Team Mates great cards on their blogs listed on my side bar. Come back soon.
Hugs, Maureen