Wednesday, April 29, 2015

Heartfelt Inspiration Wednesday


Hi bloggers. Time for some Heartfelt Creations inspiration. I've done a tag today using the Everyday Hero collection. One of my favorites, but then I seem to find myself say that about every new release, LOL I am so honored to work for this company on their Design Team. They are so generous, kind, and thoughtful that each and every day I am reminded and humbled by and of, their grace. If you haven't read the fascinating story about how this company was started, by all means do so. It's amazing to learn how one woman's love of art planted the seeds which grew this family owned company into one of the major contributors to the paper crafting world. Being on this design team is becoming one of the most memorable times of my life. 
If you haven't figured it out, I am here to tell you, the Bontrager family rocks!!!!
Now on to my tag. This is a pretty simple project and can be done up in a very short amount of time.  Tags are a really simple way to brighten someone's day. You can tie them on a package, tuck them in a book or magazine gift, pass it on with a returned item, a thank you for a kind deed, well the possibilities are just limitless!!
You can find the complete instructions for this project on the Heartfelt Blog along with lots more inspiration from my Teammates. Thanks for joining me today.
Hugs, Maureen

Monday, April 27, 2015

My Besties International Challenge #9


Hi Bloggers, time for another Besties Challenge and this one is "Blue Patterned Paper"
Won't you join us for a nun new challenge and perhaps you'll be the winner of  a stamp or badge! This challenge runs from 4-27 through 5-8-15 so you'll have plenty of time o create some Bestie goodness. You can enter HERE and follow the linky tools. Sherri has added so mny new stamps and digi's to her Etsy store you should really go check it out and be inspired!
My card today is using an image that I believe may be from the Create and Craft TV show. If I hear back with a number for here I'll post it HERE.
The paper, flowers and butterfly are all from Heartfelt Creations, my other passion.
I hope you've enjoyed my card today and have fun joining in on this challenge!
Hugs, Maureen


Friday, April 24, 2015

Faux hammered metal Tutorial


Hello, Maureen here, for Heartfelt Creations. I have a tutorial for you today on how to create a Faux Hammered Metal look for backgrounds on your cards or scrapbook pages.
The Heartfelt Creations products you will use are:

Other things you will need are:
Metal heat-resistant tape (found at Home Depot, Lowe’s, etc.)
12” X 12” piece of chipboard (I used back of a paper pad)
  Burnt orange card stock (or any color you choose)
Orange and natural twine
5” X 7” pre-scored Kraft card base
2 jeweled brads
Vintage Photo Distress ink
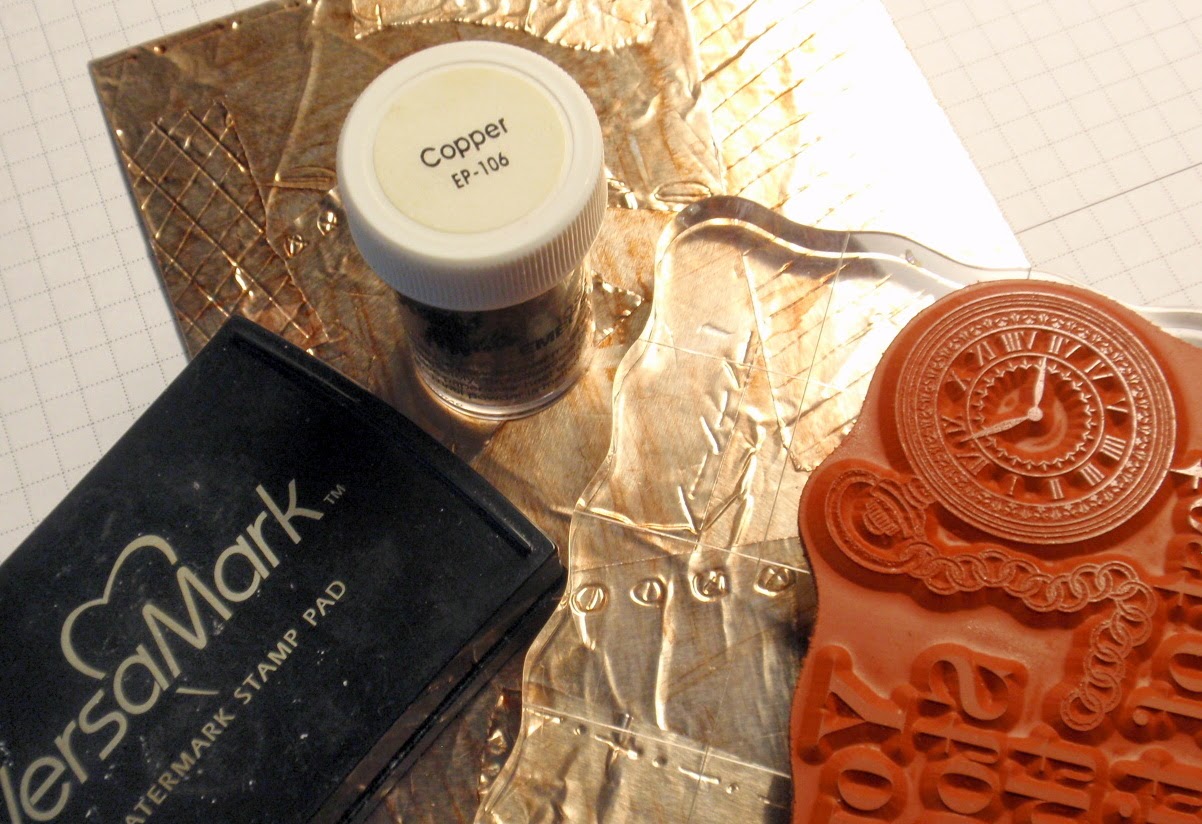
VersaMark Ink
Copper embossing powder
Ginger Alcohol Ink
Blending tool & felt pad
Pop-Dots and glue
Keep in mind any of these colors can be changed to suit your preference.
Step 1. Map a 5” X 7” area, with pencil, in the center of your cardboard or chipboard, extending lines all the way to the edges if you are going to make a card, so as to make a cutting template. Not necessary for a scrapbook layout.

Step 2. Cut two 9” pieces of metal tape. Tear (so as to have jagged edges) five 4 ½” pieces of tape
.
Step 3. Peel backing off tape, one strip at a time, and adhere to chipboard to form an “X” making sure to extend over mapped corners. Be extremely careful not to rub the edges of this tape, just tap it into place. It can be quite sharp!

Step 4. Cover remaining chipboard with 4 ½” pieces, tearing more pieces if necessary. Don’t try to be neat, the more wrinkled and scratched this is, the better it looks! If you are making a background for a 12” X 12” layout, cover remaining exposed chipboard with tape.

Step 5. Place the flower shaping pad from your Deluxe kit under the chipboard. Using the 2mm nib from the Deluxe Flower Shaping Kit, make random patterns on the tape. Lines, cross-hatching, circles, stitching, etc.

Step 6. Generously saturate felt pad on blending tool with alcohol ink, and wipe across the metal tape. You can re-wipe and pounce at this step to get the look you desire. I chose mine to appear as if it were rusty.

Step 7. Cut your 5” X 7” card front at this time. I used a guillotine cutter and didn't try this step with a standard slide/scale paper cutter. I'm not sure if this would cut through the chipboard and tape.


Step 8.  Stamp My Hero background stamp onto metal card front using VersaMark ink. Ink up the watch and boot areas and stamp onto the burnt orange card stock. From the Everyday Hero Newsprint set, stamp the arrow banner and from the Everyday Hero stamp set stamp the buckle onto the card stock as well. Dust all with copper embossing powder and heat set. Fussy cut the watch and boots.

Step 9. Cut arrow banner and buckle with matching Everyday Heroes Die.


Step 10. Sponge Vintage Photo ink on edges of die cut and fussy cut pieces. This will give them a look of old worn leather.

 Step 11. Thread banner through the buckle and add pop-dots to backs as pictured. Do not add pop-dots to ends of banner as they will be held down with brads.

Step 12. Attach pieces to card front, being sure to cover watch and boots with fussy cut pieces. Tie twine to left side of card. Using piercing nib and pad from Deluxe shaping kit make holes and insert brads.

Step 13. Fold 5” X 7” pre-scored Kraft card base and glue down metal card front to complete your card.

Thanks for joining me for this fun little picture tutorial which happens to be great for a man card, which for myself sometimes can be a struggle. I’m hoping you try this and have fun with it.

Happy crafting, from Maureen


Wednesday, April 22, 2015

Heartfelt Creations Wednesday Inspiration


Hi bloggers, time again for for some goodness from Heartfelt Creations. We are about halfway through the promotion of our latest release called Everyday Heroes. This release has something for everyone, gorgeous vintage feel papers and neutral stamps and dies perfect for male or female versions for your own personal heroes. My card today features one of the background stamps called
My Anchor I've made a window card and used the stamp as the verse for the inside of the card, yet still visible from the card front. You can find the complete instructions on the Heartfelt Creations Blog, along with all my teammates exceptionally beautiful work.
This is another short post today as i am STILL battling this virus, I'm so sick of being sick!!
Thanks for stopping in today and come back soon.
Hugs, Maureen


Wednesday, April 15, 2015

Everyday Hero Week Two


Hi bloggers, time for another piece from the newest release from Heartfelt Creations, Everyday Hero. This collection is so versatile It can be used for male or female, altered art, mixed media, and I can even see a steampunk creation! My project last week was geared more to the feminine side of me. This week I've tried to create something more toward a "man card" as most on the paper crafting circuit like to call them. My post is short this week as I have been ill for about ten days now and my head is aching. I see the Dr. tomorrow so maybe she has a cure-all in her pocket, LOL
Make sure to stop by the HC Blog for complete instructions for this project, along with all the beautiful work by my Teammates.
Thanks so much for stopping by and come again soon.
Hugs, Maureen

Wednesday, April 8, 2015

Everyday Hero Release


Happy Wednesday bloggers! It's time for a new release from Heartfelt Creations. This one is called Everyday Hero Collection, and it's awesome! It has elements for male or female creations, so the projects you can make with this collection are limitless! I'm not sure what my intentions were when I started this card, I just knew the dusty aqua roses drew me in, and I went with it! I adore how it turned out. You'll definitely have to check out the HC Blog and see all the amazing ideas from my teammates this week. I am always amazed by the different interpretations others see from each new collection. So here is my card for today and I hope you like it as much as I do.
 The complete instructions for this card can be found on the Heartfelt Creations Blog, along with lots of other inspiration! Here's a couple close-ups of the elements of my card.

Thanks so much for joining me today and please stop back in to see me again!
Hugs, Maureen

Wednesday, April 1, 2015

Wednesday Inspiration from Heartfelt Creations


Hello bloggers, happy Wednesday! I have another card for you today created from the Peacock Paisley Collection, that is Heartfelt Creations latest release. This has been the most favorite collection ever from Heartfelt! Yay!
My card today features the Daisy Flourish stamp set, the Delightful Daisy stamp set, the matching Die Set, and of course the gorgeous Peacock Paisley paper pad!
You can find the complete instructions for my card on the Heartfelt Blog, and all my other teammates work also. I have colored the image with Copic markers and I'll list the colors below.
Copics used:
Blues- B26, 24, 24
Yellows- Y26, 23, E35
Greens- G16, 12, 28

Remember next week is the release of the Everyday Hero's collections. I of course have already had a sneak peek and I LOVE it! Be sure to stop back next week for a look & I'll be anxious to hear what you think of it!
Hugs, Maureen